
If you need to send several files by mail, then compressing them into a ZIP archive will help reduce their size and number. It’s easier to send one file than several. Sometimes even several folders need to be archived. Fortunately, Mac has a built-in solution for this. The same tool will be used, if necessary, to unpack the received archives with files or folders.
If you don’t know how to work with archives on Mac yet, we can help you. Here’s how to quickly compress and unzip files and folders on your Apple PC.
BY TOPIC: Analogue of F5 on Mac, or how to refresh pages in macOS, like on Windows.
How to create a ZIP archive from files and folders on Mac
To get started, navigate to a location on your macOS drive that contains files or folders that you want to compress. Then you will need to follow the following steps:
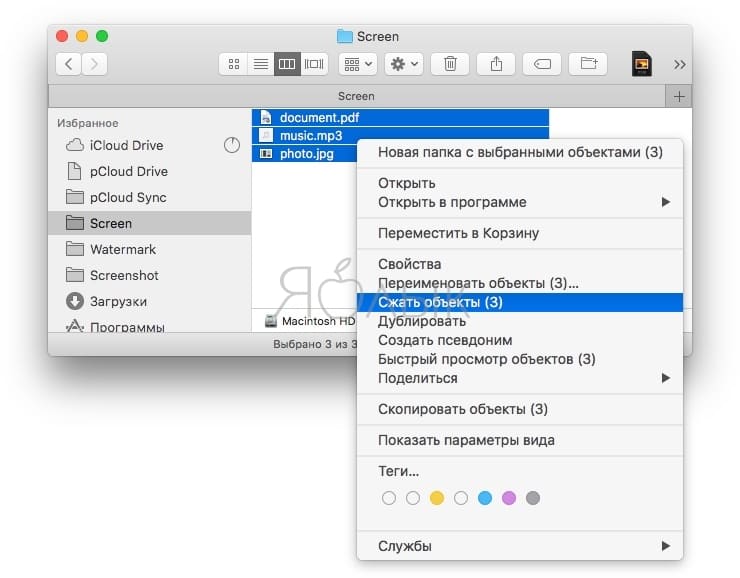
1. Select the desired files or folders. There are several ways to do this. You can use a keyboard shortcut Command (⌘) + Ato quickly select all items in a folder. You can select a range of elements by holding down the key Shift (⇧) and clicking on the first and last file or folder in the list. And you can use the pressed key Command (⌘) click on the desired elements, adding them one by one to the already selected ones.
2. After selecting the files, click the right mouse button.
3. In the context menu that opens, select “compress objects (N)”, where N is the number of files or folders you selected. Note that the term “compress” is used, not put into a ZIP archive. In fact, we are talking about the same thing.
After the archiving process is completed, you will see a new file in the same folder. By default it has the name Archive.zipbut nothing prevents you from renaming it.
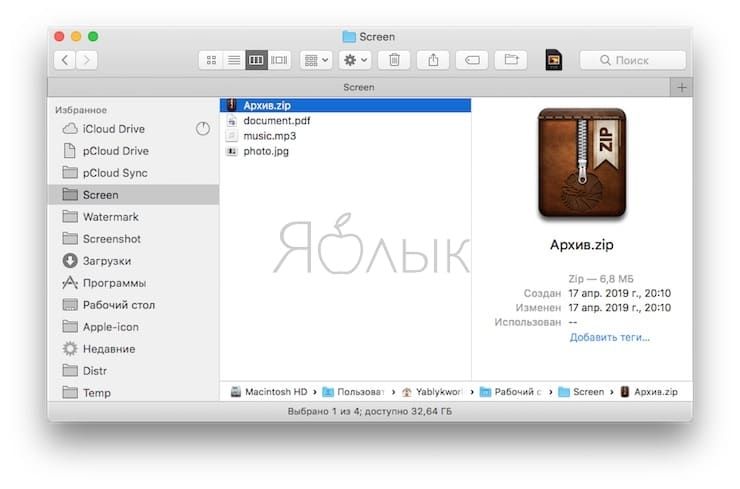
To do this, right-click on it and select “Rename” (4 Ways to Rename Files on Mac).
BY TOPIC: Mac slows down: reasons for a slow computer on macOS.
Unzip files and folders on Mac
To unzip a file, you don’t need to do anything special – just double-click on the archive. That built-in macOS file compression utility will help you extract information from archives. No third party application or special software is required. The system automatically processes these compressed files. After double-clicking on the file, the unzipping process will begin. A folder with the same name will appear next to the file.
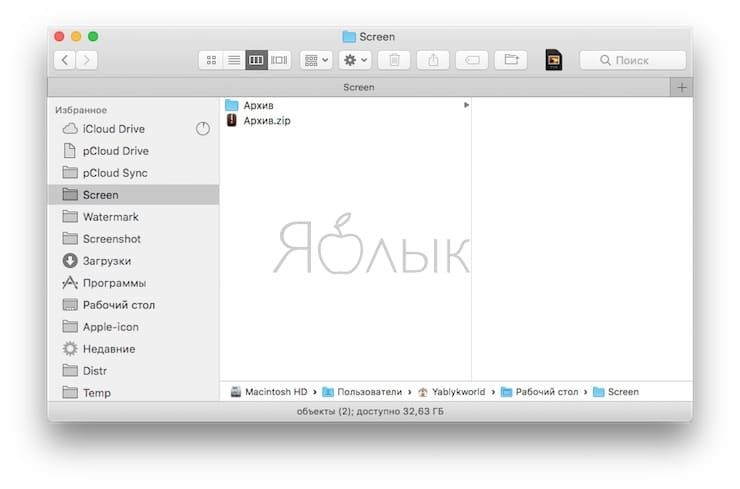
You can open it and find previously compressed files there.
We talked about how to unzip archives in RAR format in this material.
BY TOPIC: The most difficult passwords: how to come up with the right ones and not forget them – 2 tips from a hacker.
Standard Archiver on Mac
Because you don’t need to run the backup utility specifically to use it, it’s hidden in the system folder. However, there are a couple of archiving settings that you might need to change.
The quickest way to get direct access to the utility is to select the Finder section from the top menu. Go → Go to folder… . In the window for entering the path, enter /System/Library/CoreServices/Applications and press Go.
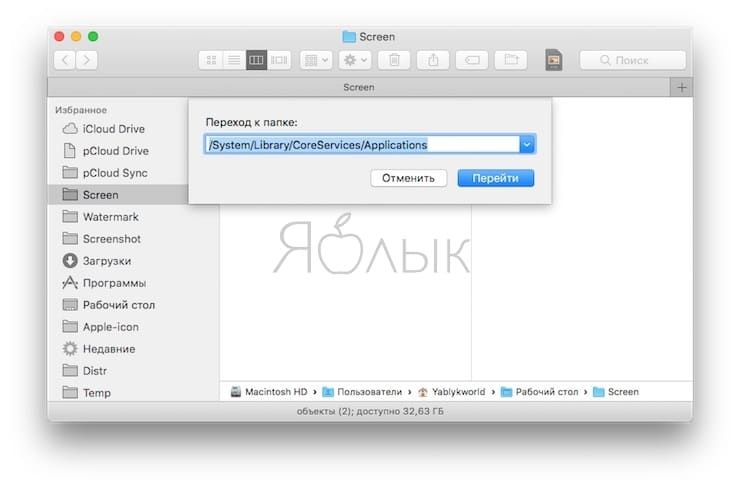
In the list of applications, you can find the item “Archiving Utility”.
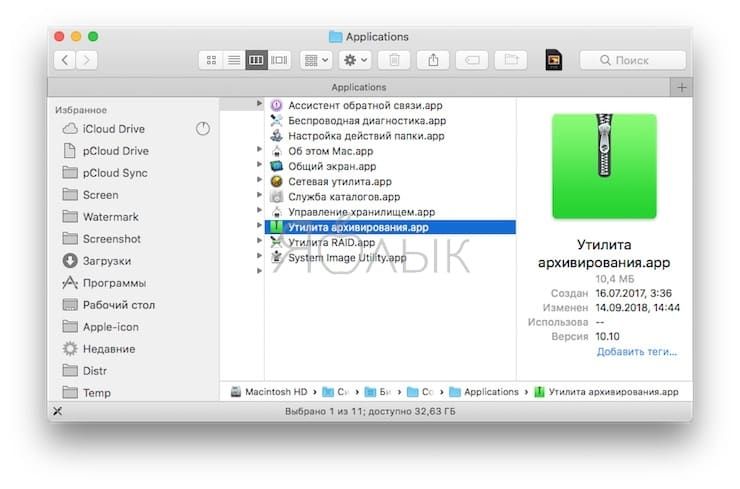
Double clicking on it will launch the program. Then in the top menu bar, click Archiving utility → Settings… .
In the window that appears, you can make some changes both for unzipping compressed files and for creating them yourself. It is possible to change the location of both the created archives and the extracted information using the “Save the archive. files” And “Save archive“. You can also set the program’s actions after archiving and unzipping in the drop-down lists “After unzipping” And “After archiving“.
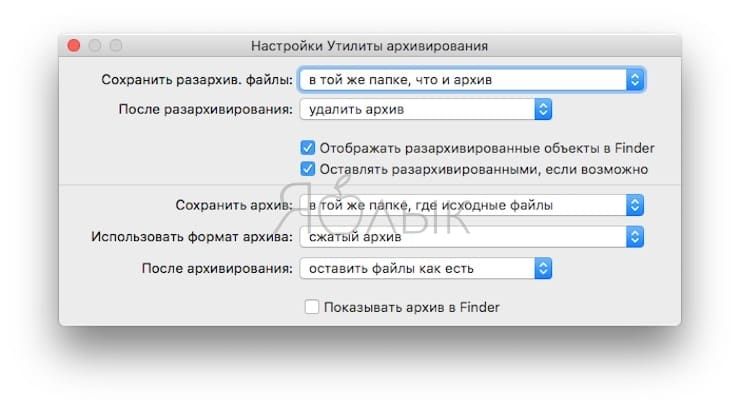
After making changes, the settings window should simply be closed.
BY TOPIC: How to sync Safari bookmarks between Mac, iPhone and iPad.
Third Party Applications
If you find that you do quite a lot of creating archives and unpacking them and this requires additional features, then we recommend several third-party solutions.
- Keka. Easy to use free popular archiver.
- A—Zippr: RAR & Zip Tool (free, with in-app purchases). This utility offers AES encryption and file preview.
BY TOPIC: Mac for Dummies: 30 Useful macOS Tips for Newbies.
Finally
Remember that Mac has a built-in archive utility to compress files and extract information from them. You don’t have to look for it and open it specially, the program works in the background. This allows you to comfortably and quickly compress and decompress files on macOS.
See also:
.
The post Archiver for Mac (macOS): the best programs appeared first on Gamingsym.